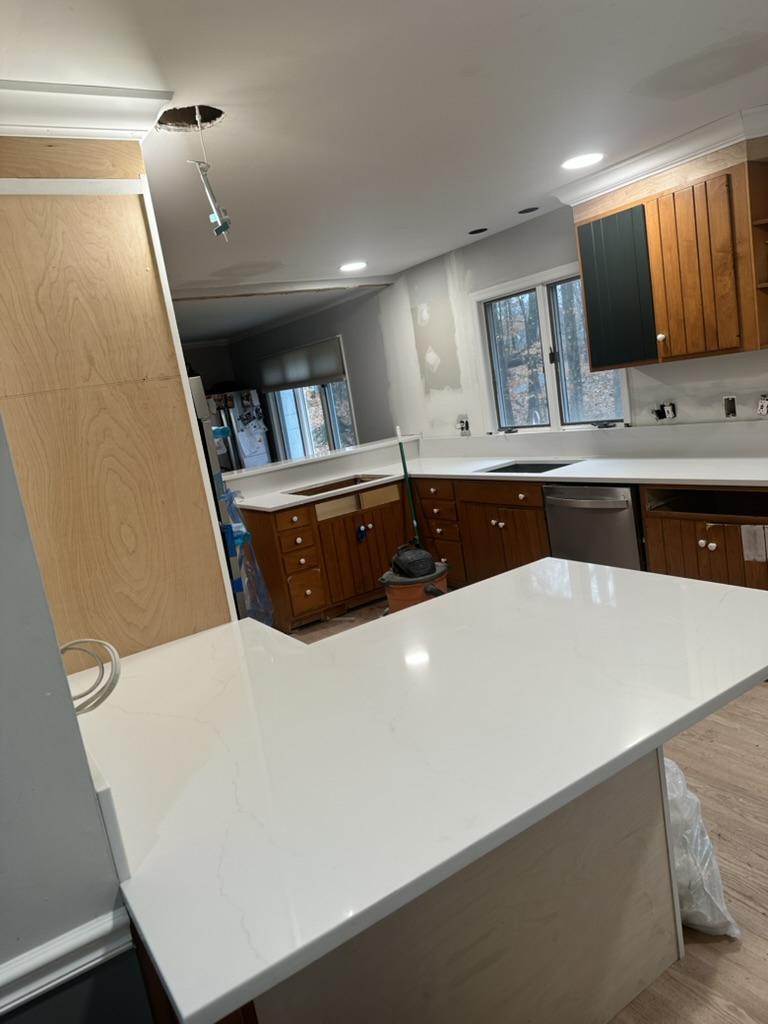
Since our last update, the Ridgefield kitchen remodel has continued to take shape with stunning results. With the red oak floors installed, custom cabinetry crafted on-site, and drywall prepared, we’re moving forward with refinements that combine craftsmanship and functionality. In this update, we’ll share our progress on repairing and customizing the existing cabinets, adding crown molding, installing the countertops, and finishing the hardwood floors.
Repairing and Customizing the Existing Cabinets
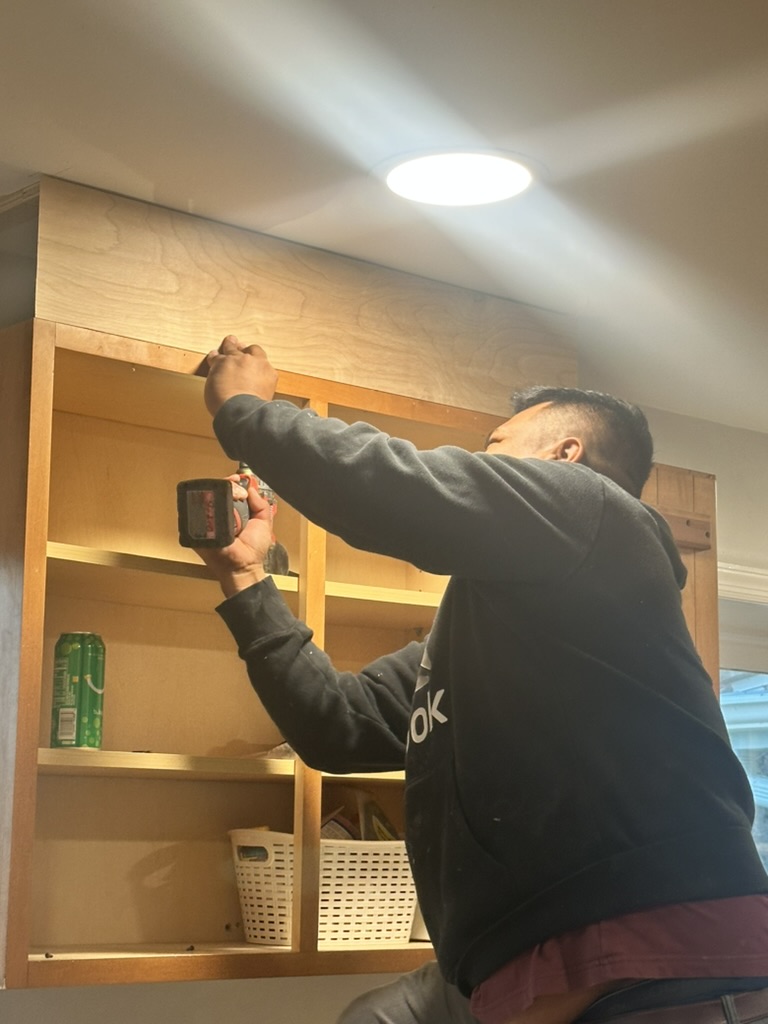
Preserving and enhancing the original cabinetry is a cornerstone of this remodel. By repairing and customizing these pieces, we’re able to retain the kitchen’s charm while optimizing its functionality. Our team is meticulously assessing each cabinet to address signs of wear, ensuring the structure and aesthetic of every unit is restored to perfection.
“We believe in making the most of what’s already there,” says Joel Ormeno, Master Carpenter. “By repairing and customizing the existing cabinets, we honor the history of the home while integrating thoughtful upgrades that bring out the best in the space.”
Customization includes modifications to accommodate modern appliances and storage solutions, ensuring the kitchen meets the needs of today’s homeowners. Additionally, we’re applying high-quality finishes to refresh the look, matching them seamlessly with the new cabinetry crafted on-site. This process not only extends the life of the original cabinets but also ensures a cohesive design throughout the kitchen.
Adding Crown Molding for a Polished Look
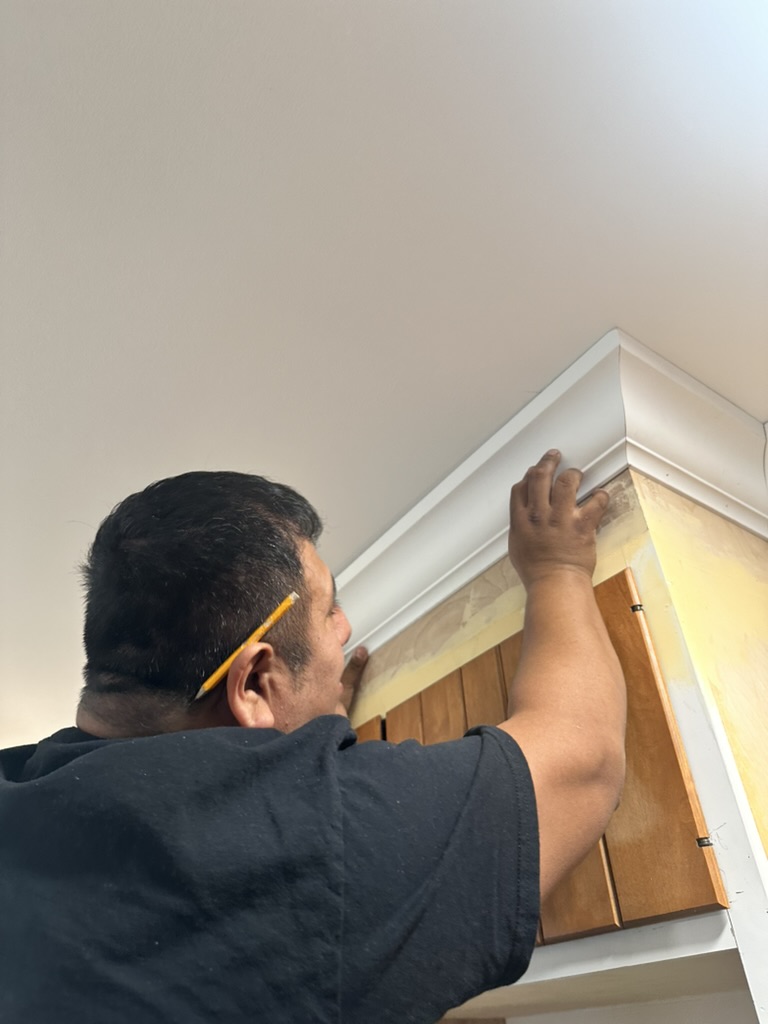
One of the most transformative details in this stage of the remodel is the addition of custom crown molding. This elegant feature ties the cabinetry together and creates a finished, polished appearance that elevates the entire room.
“Crown molding adds a touch of timeless sophistication,” explains Pedro Ormeno, Senior Contractor. “It’s the kind of detail that many homeowners don’t immediately think about, but it has a profound impact on the overall design.”
Crafted to match the style and finish of the cabinets, the molding complements the existing architecture, enhancing the kitchen’s visual harmony. Whether viewed from across the room or up close, this refined detail draws the eye upward, highlighting the height and proportions of the space.
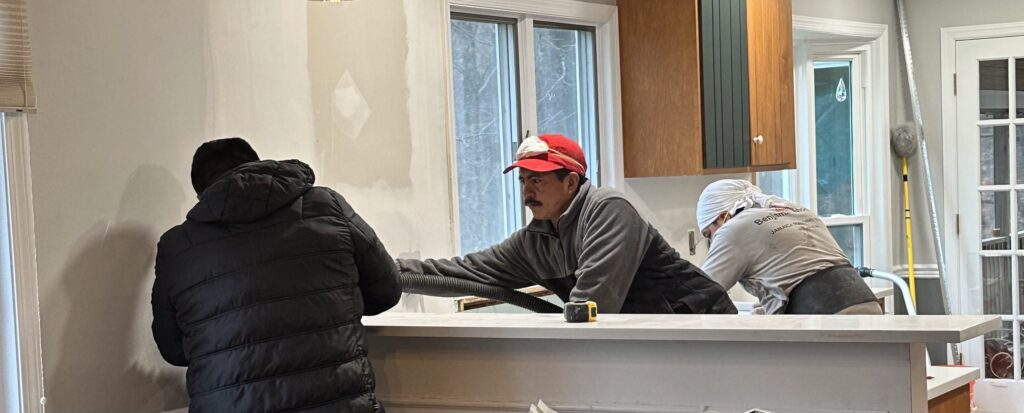
With the cabinetry and molding in place, we’re preparing to install the countertops. This step brings an exciting new layer of texture and practicality to the design. The chosen materials for the counters not only enhance the kitchen’s aesthetics but also provide the durability needed for everyday use.
Before installation, precise templating ensures every countertop fits perfectly within the layout.
“This is where precision is key,” says Joel Ormeno. “When you’re working with high-end materials like stone or engineered surfaces, there’s no room for error. Everything must be measured and aligned perfectly.”
Once installed, the countertops will enhance the kitchen’s functionality while serving as a stunning visual anchor for the room. The interplay of texture, color, and sheen promises to make this kitchen both beautiful and highly practical.
Cabinet Painting: The Final Stages
As we near the final stages of the Ridgefield kitchen remodel, the space is coming together beautifully. From custom cabinetry to the red oak floors, every element has been designed and executed with precision and care. The next major step is painting the cabinets, a process that will introduce a bold yet refined aesthetic to the space.
Painting the Cabinets in Essex Green
The homeowners have chosen Essex Green by Benjamin Moore, a deep, rich green that strikes a balance between boldness and timeless elegance. This shade, part of Benjamin Moore’s historical collection, is a versatile choice that works well in both modern and traditional settings. Its depth adds visual interest without overwhelming the space, making it ideal for creating a cohesive and balanced design.
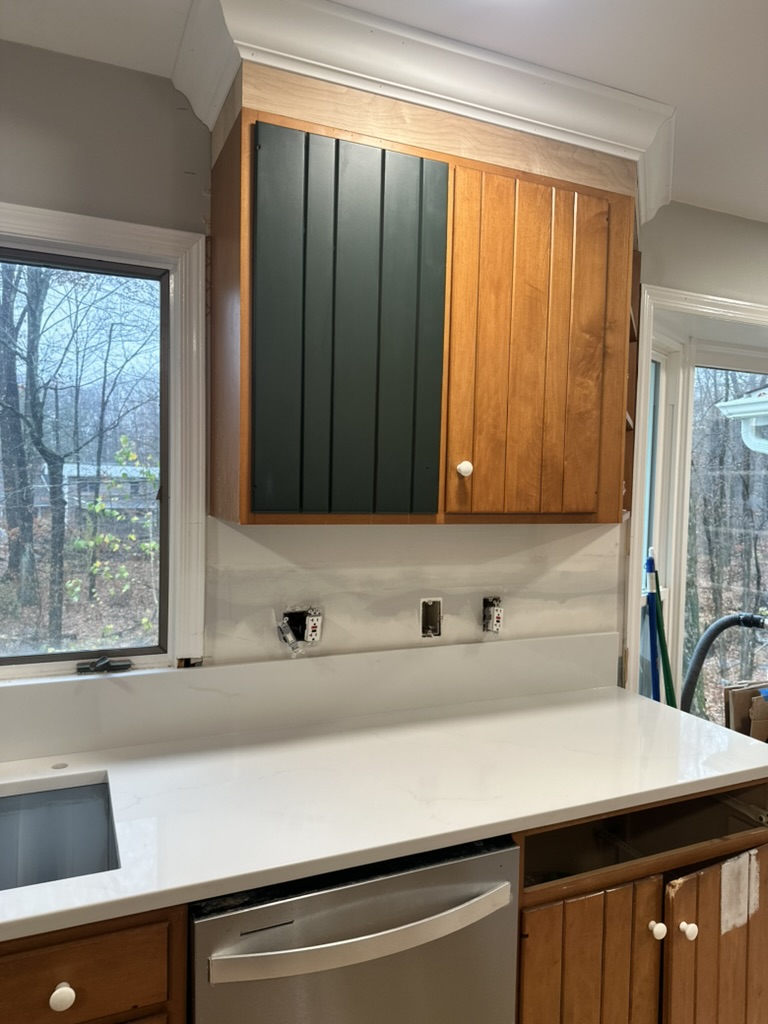
“Essex Green is an excellent choice for cabinetry,” says Pedro Ormeno, Senior Contractor. “It’s a color that enhances the overall design while blending seamlessly with other elements like wood and stone.”

The Painting Process: A Focus on Quality
Painting cabinetry requires careful preparation and execution to achieve a smooth, durable finish. After thoroughly cleaning, sanding, and priming the surfaces, the team will apply multiple coats of Essex Green to ensure an even and professional look.
“Preparation is key,” explains Joel Ormeno, Master Carpenter. “Proper sanding and priming allow the paint to adhere well and result in a finish that’s both visually appealing and long-lasting.”
Once painted, the cabinets will take on a refined appearance that complements the kitchen’s updated layout and features.
Next-Up the Final Steps: Completing the Kitchen
Contact Ormeno Construction Today
After the cabinets are painted, the focus will shift to integrating the new appliances, installing the backsplash, and finalizing the smaller details. Each component, from hardware to lighting, will work together to create a cohesive design that balances style and practicality.
“Our goal is to ensure the kitchen is both functional and visually appealing,” Joel says. “Every element, including the painted cabinets, contributes to achieving that balance.”
Stay tuned for the final update, where we’ll showcase the completed kitchen and how these thoughtful updates have transformed the space.
