

Cape Cod homes have a familiar appeal: a steep roof, a compact shape, and upstairs rooms tucked beneath the roofline. Those sloped ceilings help give the home its character, but in a bathroom, they can make everyday routines uncomfortable.
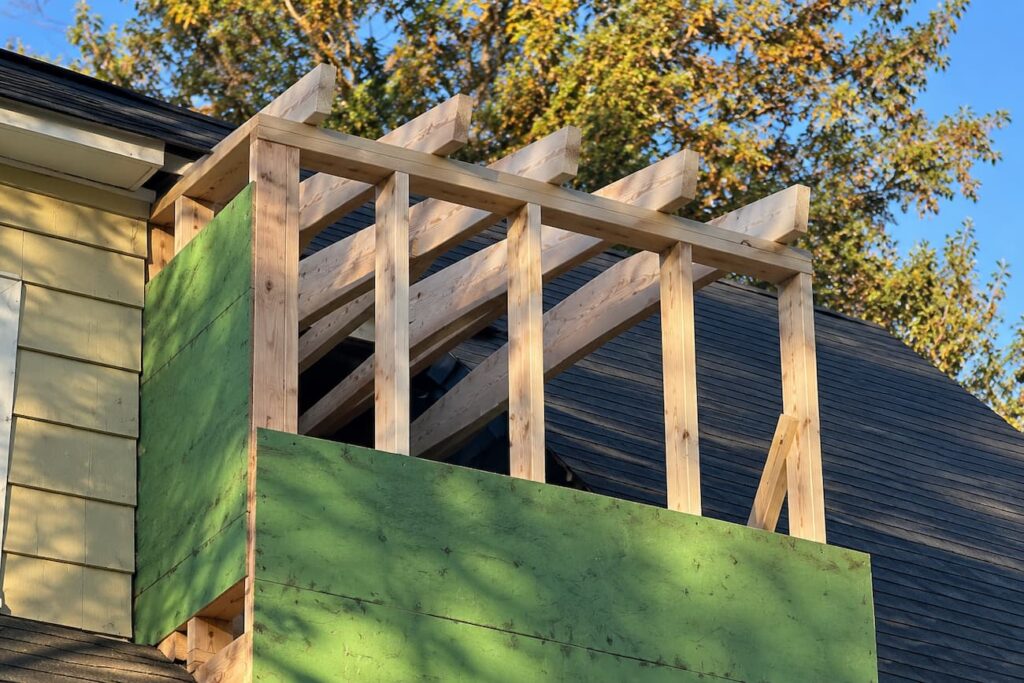
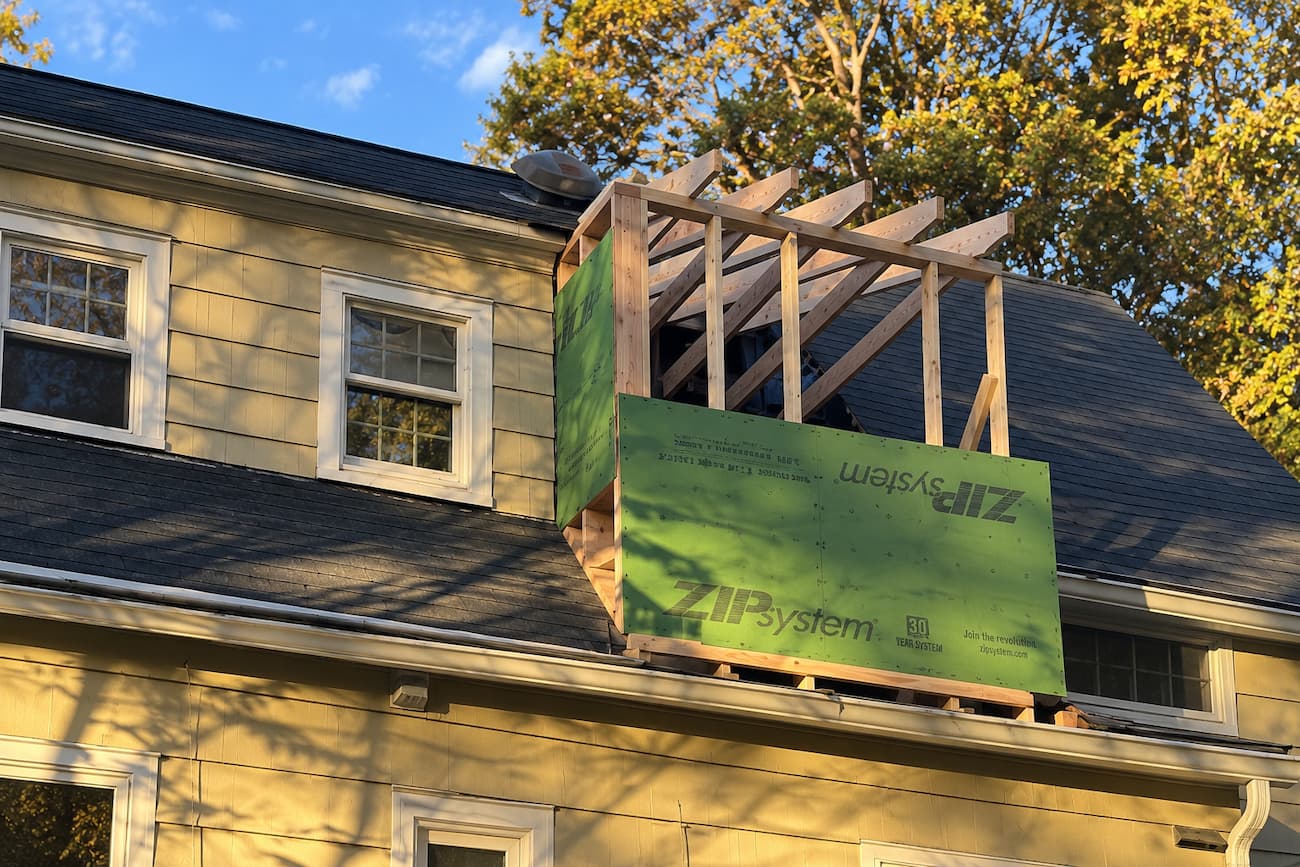
At this classic Cape Cod–style home in Sleepy Hollow, New York, our team is building a bathroom dormer to give the homeowners a regular-height ceiling and more usable headroom.
Demolition and framing are complete. With the new structure in place, the bathroom’s proportions are taking shape. Even before the walls and finishes go in, the purpose of the project is clear: give the homeowners room to stand and move comfortably.
This project also raises a useful question for anyone whose home feels a little too tight: what is the best way to create more space? A dormer is one option. Depending on the house, changing the layout, expanding a room, or making better use of unfinished areas may also be worth exploring.
What a Bathroom Dormer Changes
A dormer extends outward from a sloped roof, creating additional headroom underneath. In an upstairs bathroom, it can turn an awkward area beneath the eaves into space that feels comfortable to use.
The distinction between floor space and usable space matters here. A bathroom may have enough room on paper, yet a low ceiling can limit where someone can stand, where a shower fits, or how high a mirror can hang.
By changing the roofline over the bathroom, a dormer addresses that limitation directly. It can give the room more consistent ceiling height and greater flexibility for fixtures, lighting, and storage.
For this Sleepy Hollow home, that added headroom is the central improvement. The finished bathroom will take shape around it.
From Demolition to a Finished Bathroom
A dormer project combines structural work, exterior construction, and interior remodeling. Each stage prepares the room for the next.
1. Plan the Structure and the Bathroom Together
The desired ceiling height and bathroom layout need to work with the existing roof and supporting structure. Planning also considers how the dormer will look from outside, including its size, roof shape, and relationship to the original house.
This is when structural design, applicable approvals, and the overall scope need to be coordinated. Fixture placement, plumbing, lighting, and ventilation should be part of the discussion before construction begins.
Our general contracting services in Westchester bring these connected parts of a renovation together, from early planning through the finished work.
2. Open the Work Area
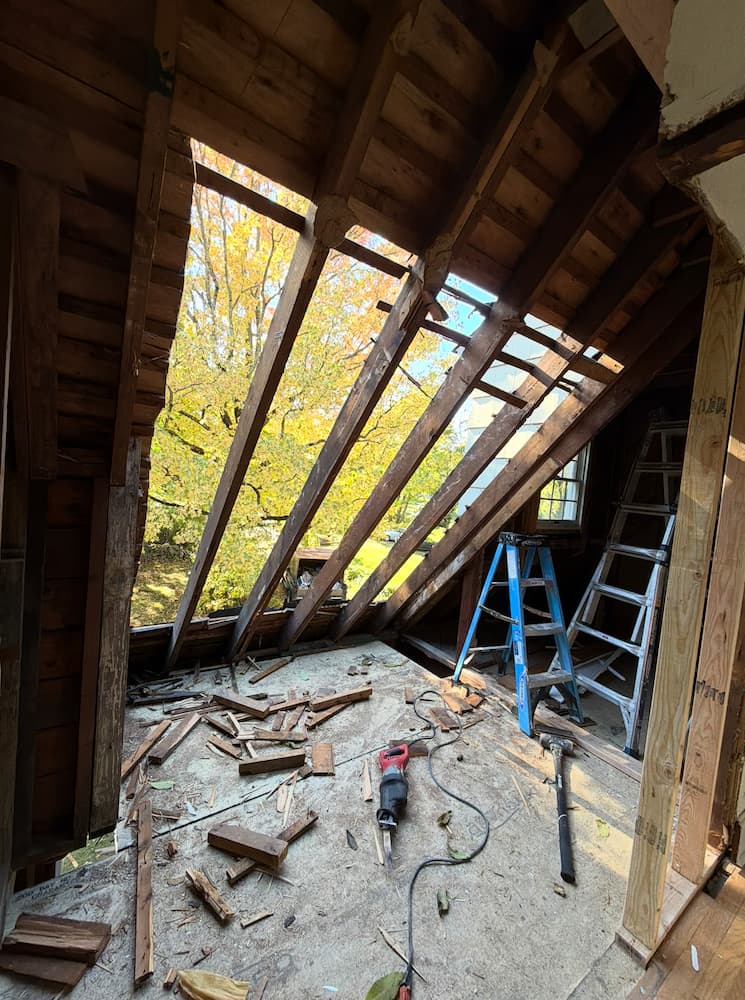
Demolition removes the materials needed to access the existing structure and prepare for the new construction. It also provides an opportunity to assess conditions that were hidden behind the finishes.
For this project, demolition is complete. The bathroom has moved beyond the tearout stage and into its new form.
3. Frame the Dormer
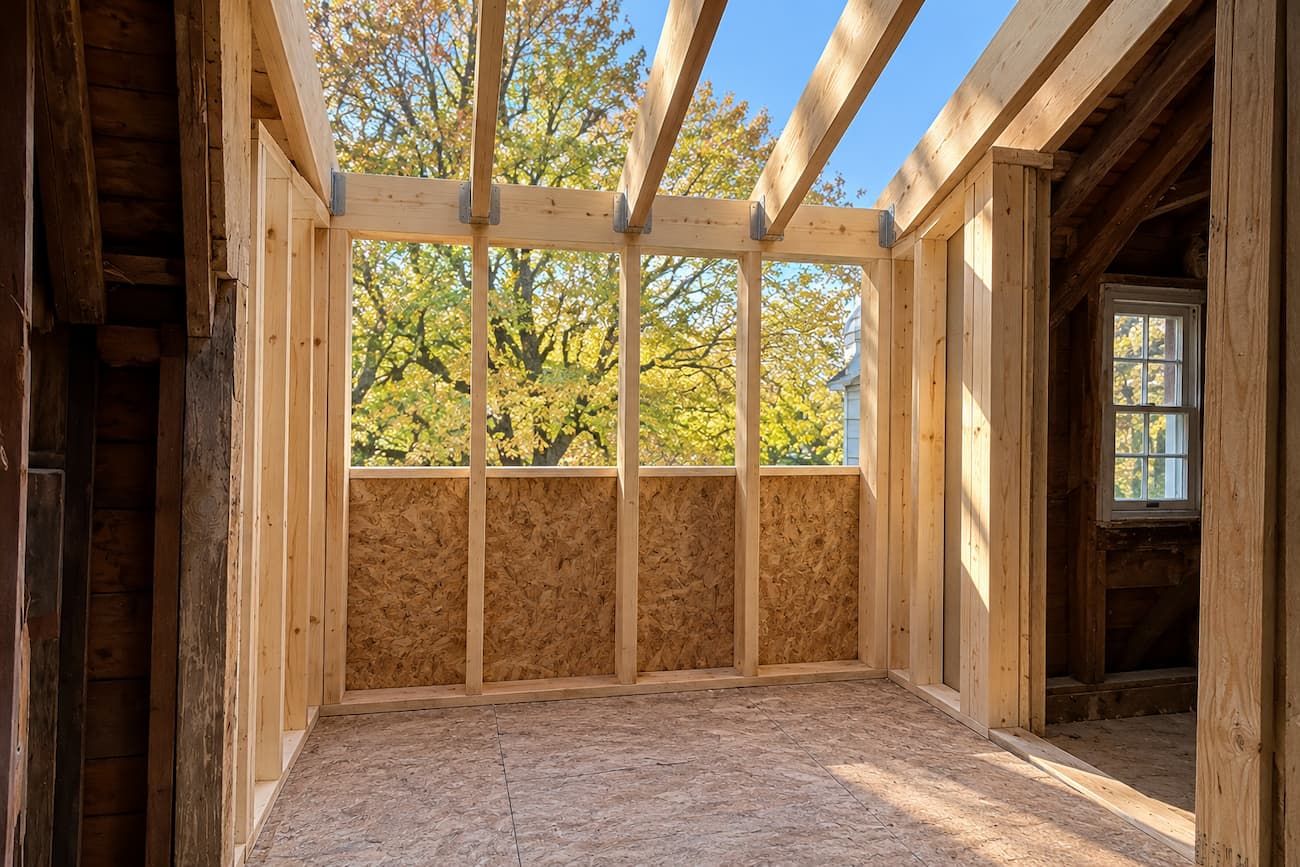
Framing establishes the dormer’s walls and roof structure, creating the volume that will become the finished bathroom.
This stage is also complete at the Sleepy Hollow home. The framing now shows where the ceiling and walls will sit, making the change in headroom easier to understand.
It is an important milestone: the improvement is no longer just a drawing or a discussion. Its shape is visible.
4. Enclose and Protect the New Structure
The exterior work connects the dormer to the existing house. Roofing, flashing, siding, and any windows need to function together, with particular attention to the points where new construction meets the original roof.
The appearance deserves the same care. A well-proportioned dormer should feel consistent with the Cape Cod’s scale and character.
5. Complete the Work Behind the Walls
Plumbing, electrical, ventilation, insulation, and air sealing prepare the space for everyday use. This phase establishes the systems that will support the finished bathroom and provides access for required inspections before surfaces are closed.
A room beneath the roof also needs thoughtful attention to comfort. The work inside the walls and ceiling matters long after the tile and paint are complete.
6. Bring the Bathroom Together
Interior finishes follow, including wall and ceiling surfaces, waterproofing in wet areas, tile, fixtures, and lighting.
This is where the structural improvement becomes a finished room. Our bathroom remodeling work considers both parts of that process: how the space is built and how it will function for the people using it.
The Benefits Go Beyond a Higher Ceiling
The most immediate benefit of this dormer is comfortable standing height. But that change can improve several aspects of the room.
- Easier movement: More headroom reduces the need to duck or work around a ceiling slope.
- More usable space: Areas that felt restricted beneath the roof can become a useful part of the bathroom.
- Better layout options: Additional height can provide more flexibility for a shower, vanity, mirror, and lighting.
- A more open feel: Consistent ceiling height can make the room feel less enclosed.
- A bathroom that works better over time: Improving the room’s basic proportions creates a stronger starting point for future needs.
The final benefit depends on the design. A dormer does not automatically solve every layout problem, but it can address a limitation that new fixtures and finishes alone cannot change.
Other Ways to Create Space in a Cape Cod
A bathroom dormer is a focused solution to a headroom problem. Other homes may need a different approach—or several improvements planned together.
Reconfigure the Existing Rooms
Sometimes the square footage is already available, but the layout makes it difficult to use. Moving a partition, adjusting a doorway, or incorporating an adjacent closet may give a bathroom more breathing room.
This approach is especially useful when ceiling height is adequate but circulation is awkward. It may allow a larger shower or a better vanity arrangement without expanding the home’s exterior.
The tradeoff is what happens to the neighboring space. Taking part of a bedroom or closet should improve the overall floor plan, not simply move the problem next door.
Consider a Wider Dormer
A dormer can serve one part of a room or extend across a larger section of the roof. A wider shed dormer may create headroom for several spaces, such as a bathroom and adjoining bedroom.
That broader change can be worth considering when low ceilings affect much of the upper floor. Its size and proportions need careful attention so the addition suits the house.
Add a Bump-Out or Room Addition
When the existing floor area is genuinely too small, extending beyond an exterior wall may be an option. A modest bump-out can provide room for a specific feature, while a larger addition can accommodate a bathroom, bedroom suite, or other living space.
Structural support, available yard space, and local requirements influence what can be built. An addition generally involves a broader scope than rearranging an existing room, so it helps to be clear about what the extra area needs to accomplish.
Raise the Roof or Expand the Second Floor
If several upstairs rooms have restrictive ceilings, a larger roof alteration or second-floor expansion may offer a more complete solution.
This can create more consistent ceiling heights and allow bedrooms and bathrooms to be reorganized together. It also means substantially more construction and disruption than a single-room dormer.
It is an option to evaluate when the homeowners’ goals involve the entire upper floor.
Convert Unfinished Space
An unfinished attic, basement, or suitable garage may offer another way to gain living space. A new office, guest area, or family room elsewhere in the house can free up existing rooms for different uses.
Feasibility depends on the space. Ceiling height, access, moisture conditions, structural capacity, and requirements for the intended use all need to be evaluated.
This approach may not fix a low bathroom ceiling directly, but it can be part of a larger plan to make the home work better.
Make Better Use of the Eaves
Low areas beneath the roof can sometimes accommodate built-in drawers, shelving, or cabinets. Moving storage into those areas keeps taller portions of the room available for standing and walking.
Built-ins will not create headroom, but they can reduce clutter and improve how the existing space functions. They can also complement a dormer, making use of the sloped areas that remain.
Start With What Makes the Room Difficult to Use
Before deciding how to expand, identify the actual limitation.
Do you need room to stand upright? More space between fixtures? A larger shower? Better storage? An additional bathroom altogether?
Those answers help determine whether the right project is a dormer, an interior reconfiguration, or a larger addition. They also help keep the budget focused on changes that will make a meaningful difference.
Comfort and access deserve consideration at this stage, too. Our accessible bathroom remodel in Sleepy Hollow offers another example of designing a bathroom around how its homeowners need to use it.
Follow the Sleepy Hollow Dormer Project
With demolition and framing complete, this Cape Cod’s new bathroom is taking shape. The next updates will follow the project through the remaining construction and interior work, showing how the added headroom translates into a finished space.
We’ll share the details as they come together, then return to the completed bathroom so you can see the full transformation.
Thinking about a dormer, bathroom remodel, or another way to create more usable space? Contact Ormeno General Construction or call 914-918-5937 to schedule a free consultation.